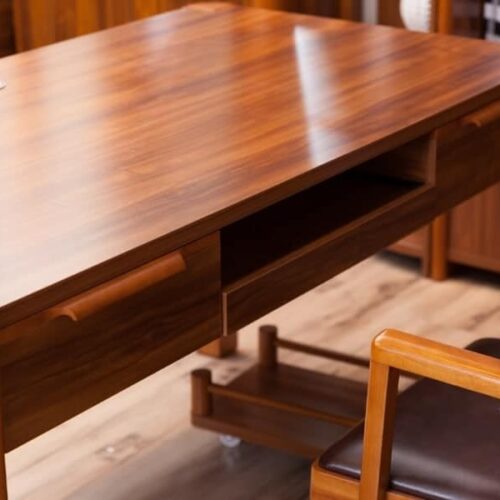
Timber furniture adds warmth, elegance, and timeless appeal to any space—but over time, it’s bound to suffer a few knocks. Whether you’re a DIY enthusiast or a professional restorer, knowing how to carry out minor repairs and touch-ups can keep your furniture looking its best for decades.
In this post, we’ll cover everything from identifying wood finishes to fixing scratches, filling chips and restoring colour—all using simple tools and furniture-safe products.
Start with the Basics: Know Your Wood Finish
Before you grab a wax or filler, it’s essential to understand the type of finish you’re working with. Each type behaves differently during cleaning or repair.
| Finish Type | Visual Clue | Repair Tip |
|---|---|---|
| Wax | Soft sheen, smears with fingernail | Buff regularly and reapply wax |
| Oil | Dark, natural look | Needs frequent re-oiling |
| French Polish | High gloss, softens with wax | Responds well to waxing |
| Polyurethane | May yellow, chips into flakes | Needs light cleaning, may not blend |
| Lacquer | Tough, forms white dust if scraped | Hard to repair, best with wax polish |
The “Restorer’s Crouch”: View Like a Pro
???? Tip: The best repairs start with great observation.
- Inspect furniture under natural light.
- Crouch and view surfaces from multiple angles.
- Look for uneven shine, residue buildup, scratches, or faded areas.
This simple habit helps you catch damage early and plan better repairs.
Tools You’ll Need
✅ Prepare these essentials before starting:
- Superfine “0000” Steel Wool.
- Pure Cotton Polishing Cloths.
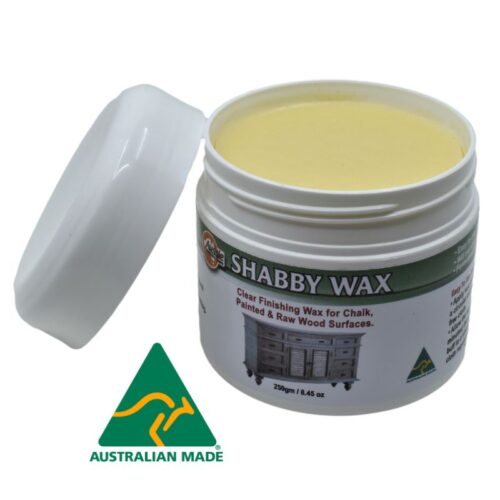
- Furniture Wax (Clear, Brown, or Black)
- Quick Polish or Furniture Reviver.
- Wax Putty Bricks & Applicator.
- Beeswax Filler Sticks.
- Scratch Fix Pens (matched to wood tone).
- Small utility knife.
- Mineral turpentine (for cleaning buildup)
- Drop sheets and protective cloths for upholstery.
Step-by-Step: Clean, Wax, and Buff
???? Cleaning Wood
- Apply wax to “0000” superfine steel wool.
- Gently rub along the grain.
- Avoid circular motions or finger pressure.
- Wipe away excess wax before it dries.
⚠️ For heavy grime: lightly wipe with cloth dampened in mineral turpentine first.
???? Waxing & Buffing
- Apply wax in circular motion, then with the grain.
- Use two thin coats for best results.
- Wait until the surface “squeaks” before buffing.
- Buff with clean cloth using cross-grain strokes.
Fixing Common Furniture Damage
???? Filling Corner Gouges
- Shape Wax Putty Brick or Beeswax Stick to fit corner.
- Press into gouge and slice clean 90° edge.
- Clean off excess wax, let it harden, then buff gently with “0000” Superfine Steel Wool..
????️ Repairing Holes & Chips
- Trim loose fibres around the damage
- Use wax slightly darker than timber for better blending
- Warm wax in your pocket to soften
- Overfill, scrape excess wax off until flush and then remove any left over wax on the surface with an old used credit card or blunt edge plastic scraper
???? Flat Surface Repairs
- Press soft wax into hole.
- Use applicator at 30°–45° angle to smooth.
- Avoid pressing below surface level.
???? Turned or Lathed Pieces
- Shape wax to gouge form.
- Press and smooth along the grain.
- Let harden, then polish to blend.
???? Deep Cracks
- Melt wax stick with a soldering iron to fill the split, crack or gouge or warm up enough to make it pliable and push the wax into the damaged are until level.
- Pour into crack and level off.
- Check entire surface after cooling if there are any unwanted shiny spots where the wax was applied.
Light Scratches? Use a Scratch Fix Pen
Scratch Fix Pens are great for touch-ups—but only when scratches break through the finish and expose raw timber.
✅ Apply along the grain.
✅ Wipe excess immediately.
✅ Let dry before waxing.
???? Not a filler—only provides colour.
Matching Complex Timber Grain
Some timbers have multiple tones. To blend repairs:
- Start with the lightest wax as a base.
- Layer darker tone following grain lines.
- Feather edges using your fingers.
- Buff lightly and reassess.
Product Spotlight: Tools for Flawless Touch-Ups
Here’s a quick summary of what each repair product does:
- Scratch Fix Pens – Stains raw timber to hide light scratches.
- Wax Putty Bricks – Fills gouges, holes, cracks.
- Furniture Repair Crayons – Quick fixes for fine scratches and nail holes.
- Beeswax Filler Sticks – Very hard wax filler sticks for large cracks and splits and corners that need moulding to shape.
- Furniture Wax – Adds protection, sheen and subtle fill.
- Furniture Restorer Oil – Refreshes tired surfaces and removes haze. Works excellent when applied with “0000” Superfine Steel Wool.
Safety & Success Tips
✅ Always test in an inconspicuous spot.
✅ Use natural daylight for colour accuracy.
✅ Dry used rags individually to prevent combustion.
✅ Keep surfaces dust-free before applying any product.
✅ Work on the piece in its regular room position to match light and surroundings.
Final Thoughts
Minor damage doesn’t mean your timber furniture has to be replaced or look worn forever. With the right products and a little know-how, you can restore beauty and extend its life—whether you’re repairing a beloved family heirloom or a well-used dining table.
If you’d like a downloadable version of our full guide or product recommendations, reach out to us or explore our Furniture Care Product Range.
Other posts you may like:
- Quick & Easy Australian Leather Type Identifier Card
- What Type of Leather Do I Have? The Ultimate Australian Leather Identification Guide
- A Painful Lesson in Floor Care: What One Scratch Taught Me
- The Great Australian Leather Care Myth-Buster: 15 Things You Could Be Doing Wrong
- Felt Sliders or Rubber Grippers — Which Floor Protectors Best Prevent Furniture Damage?